
A group is a collection of people with some common characteristics or purposes. For example, if your company is a school, a group could be the students from a classroom.
You can create as many groups as you like within your organization.
Video
Steps
To create a group:
- Once you are logged in your account, click on Partner Portal.
- On the left menu, click on Groups.
- Click on NEW GROUP.
- Complete 3 steps:
STEP 1. BASIC INFORMATION
-
-
- Type the Group name (required). Note. You cannot create a group with the same name than an existing group
- Type a Description (optional).
- Click on NEXT or click on STEP 2
-
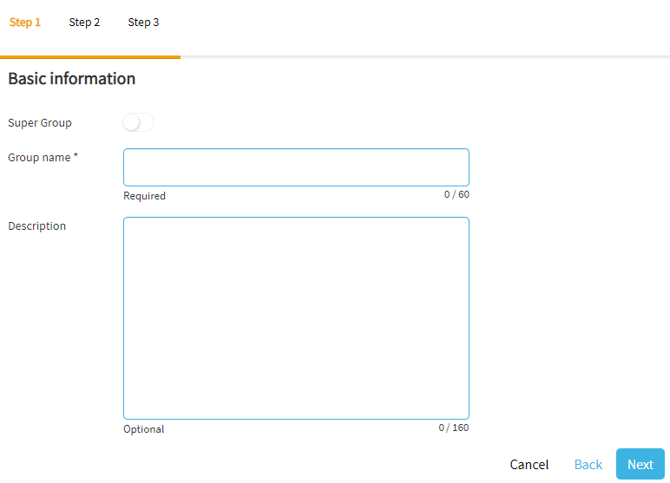 ¿What is a Super Group?
If you need to manage several groups, you can create a Supergroup. A Supergroup is a group of groups.
-
-
-
- Active the
-
- Type the Group name (required) and a Description (optional).
- Select the groups.
-
STEP 2. SELECT MEMBERS
-
- Select the users one to one (Note. If you want to include all students in the group, click on Name). Note: to see the users you want to add, these should already have an account that belong to your organization. If these users do not exist yet, you can create then by clicking on CREATE USER or IMPORT USERS.
 b. Click on NEXT or click on STEP 3
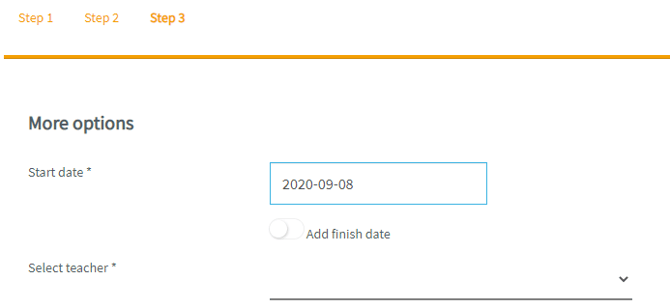
STEP 3. MORE OPTIONS
-
-
-
- Select the start and finish date of the group:
-
-
-
-
- Click on the Start date, and select the start date of the group.
- Click on the Add finish date, and select the finish date of the group.
-
-
-
-
-
-
- Select the teacher:
-
-
-
-
- Click on Select teacher.
- Select the teacher who will oversee this group.
-
-
-
Note. You need, at least, one user with this role.
-
-
- Click on CREATE.
-
What would you like to do next?
-
- Do you want to create a new user? Click here for more info.
- Do you want to import users? Click here for more info.
- Do you want to manage a group? Click here for more info.
- Do you want to order keys? Click here for more info.
- Do you want to create a user/group report? Click here for more info.